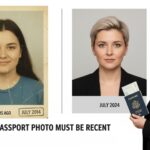
Getting a visa photo taken sounds simple, right? Snap a picture, print it, and you’re good to go. But if you’ve ever tried this, you know how tricky it can be to avoid glare and shadows. A poorly lit photo can lead to rejection, extra trips, and a lot of frustration. Let’s break down everything you need to know to get that perfect, glare-free visa photo.
Why Glare and Shadows Are a Big Deal in Visa Photos
You might be thinking, “It’s just a photo. How bad can glare be?” The truth is, even a small glare can completely obscure important facial features. Visa photos are not like casual selfies; they are official documents used to identify you. A bright spot on your forehead or nose caused by glare can make your eyes, nose, or skin tone look unnatural. This misrepresentation can confuse the automated facial recognition systems that many countries use, and even human officers may struggle to clearly see your features, leading to delays or outright rejection of your application.
Shadows can be just as problematic as glare. Uneven lighting can create dark patches on your face, hiding your jawline, cheeks, or even one side of your face entirely. A shadow cast by your nose or chin can make your facial structure appear distorted, which is particularly concerning because visa photos are meant to be an exact, neutral representation of your face. Any misalignment or distortion can be interpreted as an error or attempt to manipulate the photo, which authorities take very seriously.
Another subtle but important issue caused by glare and shadows is the uneven skin tone it creates. Harsh lighting or reflective surfaces can exaggerate oiliness, redness, or blemishes, making your skin appear blotchy or inconsistent. Even minor variations in tone can be flagged as unsuitable for official documentation because they affect the overall clarity and uniformity of the image. Visa officers are trained to look for these inconsistencies, so what might seem like a small cosmetic issue to you could have serious consequences in the context of your application.
Finally, the impact of glare and shadows is not just technical—it’s practical. A photo rejected due to poor lighting means additional trips to a photo studio, more time spent on retakes, and potential delays in your visa process. Considering the stakes, taking the time to ensure your photo is evenly lit, shadow-free, and glare-free is essential. It’s not merely about looking presentable; it’s about meeting strict regulatory standards that are designed to protect your identity and streamline international travel. Proper lighting is an investment in convenience, accuracy, and ultimately, the success of your visa application.
The Ideal Lighting Setup for Visa Photos
- Lighting is the most crucial factor when it comes to taking a glare-free and shadow-free visa photo. Without proper lighting, even a perfectly positioned camera can produce a photo that is unsuitable for submission. The goal is to have soft, even lighting that illuminates your face uniformly, highlighting all features without creating harsh shadows or bright spots.
- Natural light is generally the best option for visa photos because it is soft, diffused, and evenly distributed. When using natural light, it is ideal to position yourself facing a large window that lets in indirect sunlight. Avoid standing in direct sunlight, as it can create overexposed areas on your face and harsh shadows that distort your appearance. Morning and late afternoon are the best times for photos because the sunlight is gentler and less likely to cause glare. Be careful with overhead sunlight, as it can cast shadows under your eyes, nose, and chin, which are unacceptable in official documentation.
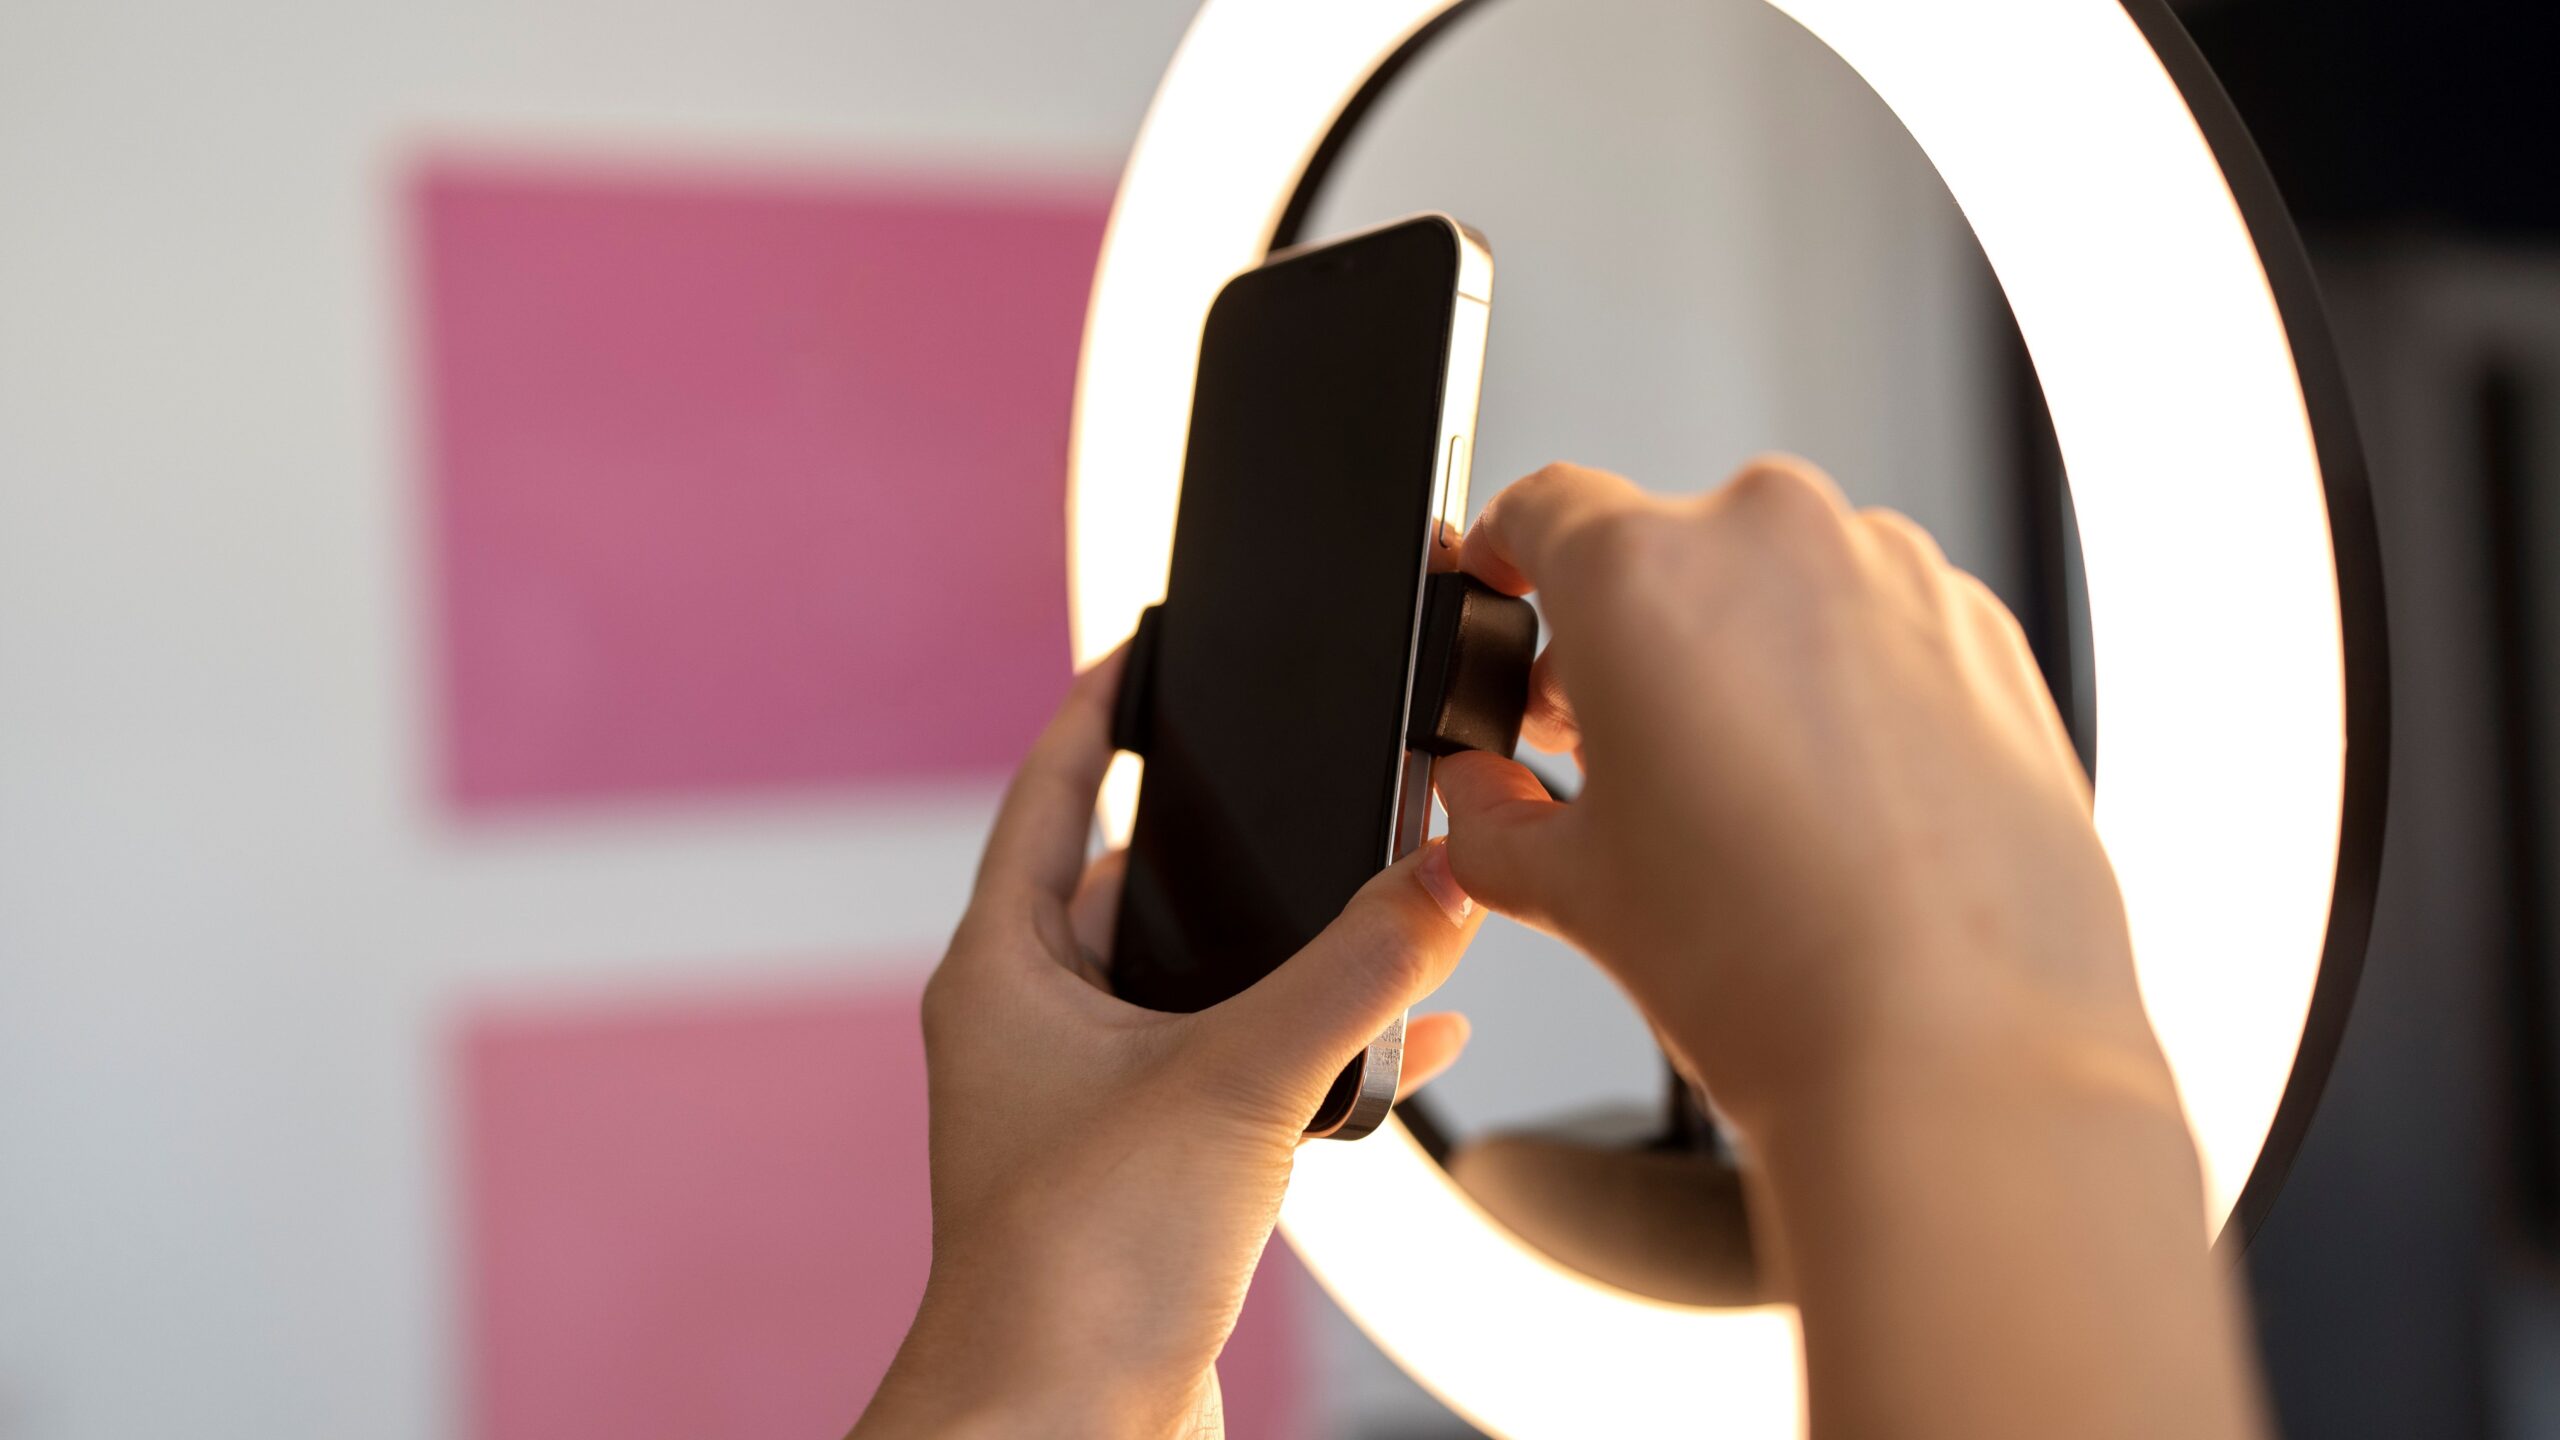
- Artificial lighting can be just as effective if natural light is unavailable, but it requires more careful setup. Using two softbox lights positioned at roughly 45-degree angles from your face can create a balanced, even illumination that reduces shadows. LED ring lights with adjustable brightness are another excellent option, providing soft, consistent light that prevents glare on your skin or glasses. Avoid using the direct flash from your camera, as it often produces harsh glare, bright spots, and unnatural reflections that can obscure facial details.
- The key is to create a lighting environment where your face is uniformly lit from all sides without causing any sharp contrasts. Diffusing the light using a softbox, umbrella, or even a white sheet can help soften harsh beams. Position lights slightly above your eye level and angled downward to mimic natural sunlight, which makes the face look natural and well-defined. Checking the photo for evenness of light before capturing the final image ensures that no shadows are present behind the ears, under the chin, or along the jawline.
- Consistency is essential. Whether using natural or artificial light, maintain the same setup throughout multiple shots to ensure uniformity. Even minor changes in angle or distance from the light source can produce shadows or glare, so experiment with positioning and take several test shots to find the optimal setup. Once you find the right balance, your visa photo will be clear, professional, and fully compliant with official requirements.
The Right Background Matters
| Background Type | Effect on Photo | Glare Risk | Shadow Risk | Recommendation |
| Plain White Wall | Provides clean, uniform appearance | Low | Minimal if lighting is balanced | Ideal choice for most visa photos |
| Off-White or Light Grey Wall | Slightly softer look, professional | Low | Minimal | Acceptable alternative to white; often used in official studios |
| Matte Finish | Reduces light reflection and glare | Very low | Low | Best for home setups; avoids shiny patches |
| Glossy or Reflective Wall | Causes bright spots and glare | High | Moderate | Avoid; reflective surfaces distort facial features |
| Patterned or Textured Wall | Can create distractions and uneven shadows | Moderate | High | Not recommended; patterns interfere with facial recognition |
| Colored Wall (Light Pastels) | Slight color cast on skin | Low to Moderate | Minimal | Only use if neutral colors are unavailable; avoid bright or dark colors |
| Curtain or Fabric Backdrop | Softens light and reduces glare | Low | Low if smooth | Good DIY option; avoid wrinkles or reflective fabrics |
| Professional Studio Backdrop | Consistent neutral color, smooth | Very low | Very low | Best for guaranteed compliance with official guidelines |
Camera Settings That Reduce Glare
Even if you’re not a professional photographer, understanding basic camera settings can make a huge difference in the quality of your visa photo. A properly configured camera can help control glare, shadows, and uneven lighting, ensuring that your face is captured clearly and accurately. While many people rely on automatic settings, taking a few moments to manually adjust your camera can drastically improve your photo’s acceptability. These adjustments are particularly important if you’re taking the photo at home, where lighting conditions may not be ideal.
One of the most common mistakes when taking visa photos is using the camera’s flash. Direct flash often causes bright reflections on glasses, shiny skin, or oily areas of the face. These bright spots can obscure important facial features, making the photo unsuitable for submission. Instead, using soft, diffused lighting, whether natural or artificial, helps evenly illuminate the face without creating glare. Positioning lights at an angle rather than directly in front of the face also prevents reflections and produces a more natural, flattering look.
Adjusting exposure is another critical step. Cameras allow you to slightly decrease exposure, which reduces overexposed areas on the forehead, cheeks, or nose. Overexposure often creates unwanted glare, washing out your facial features and making your skin appear unnaturally bright. By controlling exposure, you ensure that all parts of your face are visible and properly highlighted, giving a balanced and clear representation that visa officers can easily assess.
White balance settings also play an essential role in avoiding glare and color distortions. Incorrect white balance can create unnatural skin tones or color casts, which can make the photo look unprofessional or inconsistent with official requirements. Adjusting the white balance according to the lighting conditions—daylight, fluorescent, or LED—ensures that your skin tone appears natural and even. Together, these camera settings—avoiding flash, adjusting exposure, and setting proper white balance—create a glare-free, professional-looking photo that meets visa requirements without the need for expensive equipment.
Positioning Yourself for a Flawless Photo
- Your position relative to the camera and lighting sources is one of the most important factors in creating a glare-free, shadow-free visa photo. Even minor adjustments in angle or distance can drastically affect how your face appears, so taking time to position yourself correctly is essential.
- Keep your face perfectly straight toward the camera. Facing forward ensures that both sides of your face are evenly lit and fully visible. Avoid turning or tilting your head, as this can create unwanted shadows along your jawline, under your chin, or around your nose. A straight-facing posture helps visa officers see all your facial features clearly, which is crucial for identification purposes.
- Maintain a relaxed, neutral expression. Smiling too much or frowning can change the shape of your face and create subtle shadows that are more noticeable under strong lighting. A calm, neutral expression also meets most visa photo requirements, which often specify that the mouth should be closed and eyes fully open.
- Pay attention to your distance from the background. Standing too close to a wall or backdrop can cause shadows to appear behind your head or shoulders. Aim to position yourself approximately 1–2 feet away from the background. This distance allows the background to remain smooth and uniform while preventing dark, distracting shadows from forming.
- Consider the height and angle of the camera. The camera should be at eye level to capture your face naturally and prevent distortion. Shooting from too high or too low can change the perception of your facial proportions and create shadows in unexpected areas. Adjust the tripod or camera stand as needed to achieve this ideal level.
- Check the alignment of your body and shoulders. Keep your shoulders relaxed and squared with the camera. Leaning forward, backward, or sideways can cast uneven shadows on your neck or collarbone, which may interfere with the clarity of your photo.
- Take multiple test shots. Even if you follow all the positioning rules, small variations in stance or angle can create subtle shadows or glare. Taking several test photos allows you to adjust your position, lighting, and camera angle until everything appears balanced and clear.
- Use markers if needed. If you’re taking a home photo, placing tape on the floor to mark where to stand or sit ensures consistency between shots. This simple step can prevent accidental shifts in distance or angle that might create shadows or uneven lighting.
Tips for Glasses and Eyewear
| Tip | Why It Matters | How It Helps | Potential Issue if Ignored | Additional Notes |
| Tilt Glasses Slightly Downward | Direct light hitting lenses can cause glare | Redirects reflections away from eyes | Bright spots may obscure eyes or eyebrows | Ensure tilt does not obscure your eyes; slight adjustment is enough |
| Raise Lights Higher | Light reflecting directly off lenses creates glare | Higher light sources reduce frontal reflection | Direct reflections on glasses can appear as white spots | Place lights at 45-degree angles for best results |
| Remove Glasses | Eliminates glare entirely | Ensures clear, unobstructed view of eyes | Not allowed if prescription lenses are required by guidelines | Only remove if visa rules permit; contact lenses are a suitable alternative |
| Use Anti-Reflective Coating | Glasses with anti-reflective coating reduce reflections | Minimizes glare without removing glasses | Glare can still occur under strong lighting | Works best in professional studio settings |
| Adjust Camera Angle Slightly | Changing angle can redirect reflections | Reduces risk of glare appearing in final photo | Wrong angle may cause shadows on the face | Combine with proper lighting for best results |
| Avoid Tinted or Dark Lenses | Dark lenses can hide eyes and features | Eyes are fully visible | Photos may be rejected | Use clear prescription glasses or remove if allowed |
| Check Test Shots | Review for glare before final shot | Allows adjustment before submission | Glare may go unnoticed in one shot | Take multiple shots to ensure clarity |
Using Diffusers and Reflectors
Lighting is one of the most critical elements in achieving a glare-free and shadow-free visa photo, and diffusers and reflectors are invaluable tools for controlling it. A diffuser is any material or device that softens harsh light, spreading it evenly across your face. This prevents bright spots or glare from forming on your forehead, cheeks, or nose, which can otherwise obscure key facial features. Using a diffuser ensures that the light hitting your face is gentle and balanced, creating a natural, professional appearance without harsh contrasts.
Reflectors work in the opposite way by redirecting existing light onto areas that may be underexposed. They are particularly useful for filling in shadows under the chin, around the jawline, or on the sides of the face. Even simple, inexpensive items such as a white sheet, foam board, or cardboard can function as a reflector at home, bouncing soft light back onto your face. This technique reduces the need for additional lighting equipment while still providing excellent results, making it a practical option for DIY visa photo setups.
Using diffusers and reflectors together creates a well-lit, professional-looking environment without requiring professional studio gear. For example, placing a diffuser in front of a lamp or window softens the incoming light, while a reflector positioned on the opposite side fills in any shadows created by the main light source. This combination ensures your face is evenly illuminated, highlights natural features, and eliminates glare, resulting in a photo that meets strict visa requirements.
Even if you don’t have access to professional photography equipment, creative use of everyday items can produce impressive results. Lightweight white fabrics, tracing paper, or semi-transparent curtains can serve as makeshift diffusers, while white cardboard or poster board works as a reflector. By carefully positioning these tools, you can control light intensity and direction, ensuring that your visa photo is clear, professional, and fully compliant with official guidelines. Proper use of diffusers and reflectors is a simple yet highly effective way to take your visa photo from average to flawless.