Taking a passport photo might seem like a chore, but in today’s digital age, you can actually do it at home and upload it online. Sounds convenient, right? But is it really that simple? Let’s break it down and explore everything you need to know.
Why Consider Taking a Passport Photo at Home?
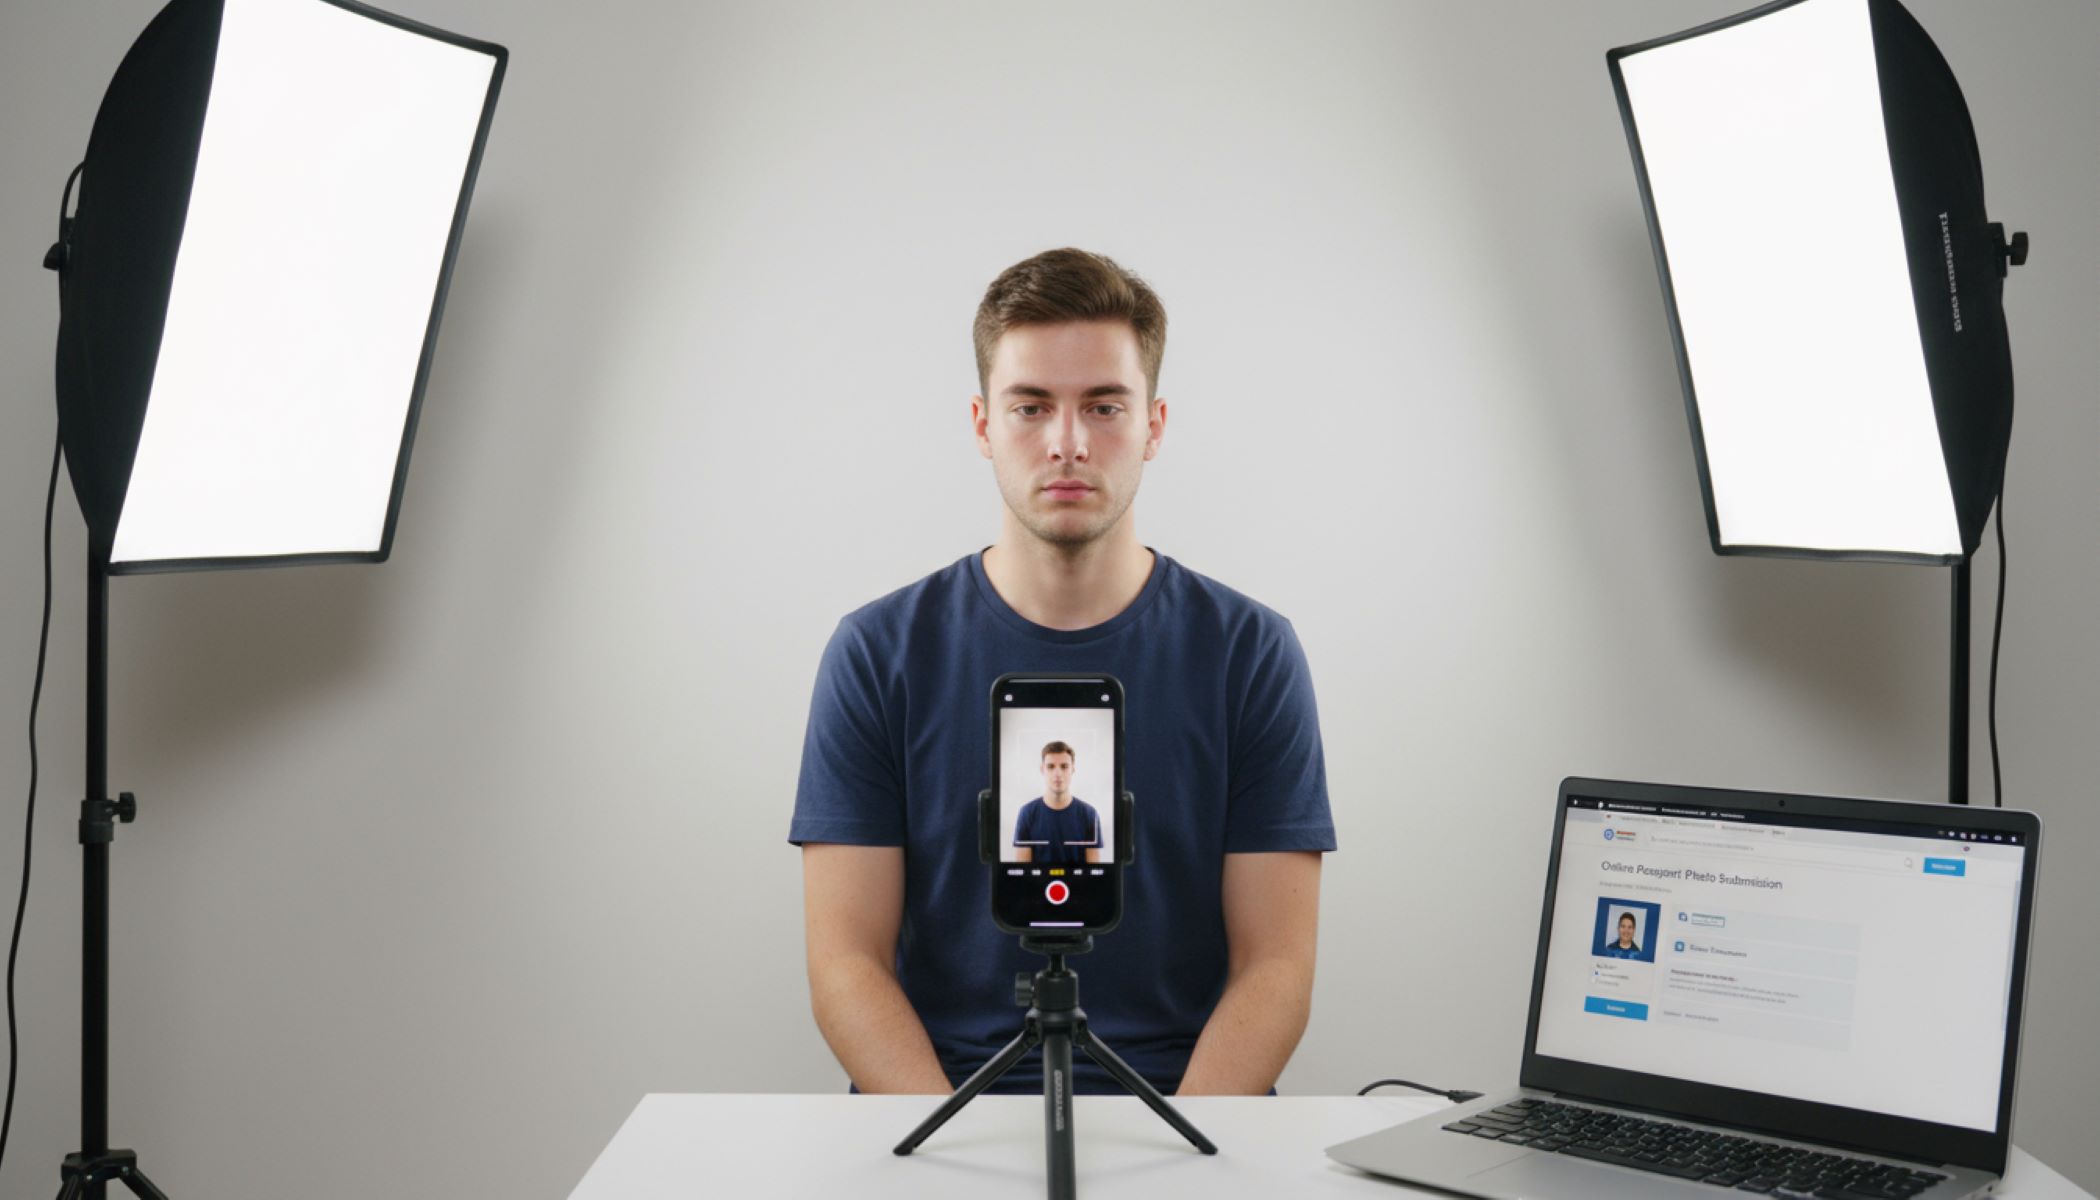
Taking a passport photo at home has become increasingly popular, and for good reason. One of the biggest advantages is convenience. Instead of scheduling an appointment, traveling to a photo studio, and waiting in line, you can take your photo anytime that suits your schedule. This flexibility is particularly useful for busy professionals, parents, or anyone who struggles to find time during regular business hours. With just a smartphone or camera and a plain background, you can handle the entire process from the comfort of your home without disrupting your day.
Another major factor driving the DIY trend is cost-effectiveness. Traditional passport photo services typically charge between $10 to $20 for just a few prints, which can add up if you need multiple copies or renew your passport regularly. By taking your own photo, you can eliminate these recurring expenses entirely. Even if you decide to print your photo at home or use a digital service to format it correctly, the overall cost is often a fraction of what a professional studio would charge.
Time-saving is also a compelling reason. Many people underestimate how much time goes into traveling to a studio, waiting for a session, and then picking up or mailing the finished photos. With a home setup, you can complete the process in minutes. You also have the advantage of taking multiple shots and selecting the best one without the pressure of a ticking timer. This makes it easier to meet official guidelines, ensuring your photo will be accepted without delays caused by resubmissions.
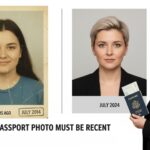
Finally, taking a passport photo at home is perfectly suited for digital applications. Governments increasingly allow online submission of passport photos, especially during renewals or e-passport applications. A high-quality digital photo taken at home can be uploaded instantly, removing the need to print, mail, or physically submit the picture. This digital readiness is ideal for anyone applying online, as it streamlines the entire process and reduces the chances of logistical errors. However, it’s crucial to remember that despite the convenience, you must strictly follow the official photo guidelines to avoid rejection or delays.
The Basics of Passport Photo Requirements
| Requirement | Standard Details | Common Mistakes | Tips for Compliance | Notes |
| Photo Size | Typically 2×2 inches (51×51 mm) in the US, 35×45 mm in Europe, or country-specific sizes | Cropping too closely, including background beyond the border, or resizing incorrectly | Measure accurately with a ruler or use online tools to crop digitally | Always check your country’s exact size requirement before submission |
| Background | Plain white or light-colored, with no patterns, textures, or shadows | Shadows on the wall, cluttered background, colored walls | Use a blank wall, large white sheet, or online background removal tools | Avoid patterned curtains or furniture behind you |
| Face Position | Full face visible, head straight, eyes looking directly at the camera | Tilting the head, partial profile, or obscured face | Keep your head centered, chin level, and shoulders squared | Ensure ears and hairline are visible unless covered for religious reasons |
| Expression | Neutral expression, mouth closed, eyes open, no exaggerated smiles | Smiling widely, frowning, squinting, or raised eyebrows | Relax your facial muscles, breathe normally, and look directly at the camera | Children may have slight smiles if necessary, but adults must remain neutral |
| Accessories | No hats, sunglasses, headphones, or items obstructing the face | Wearing glasses that reflect light, hats that cast shadows, or jewelry covering features | Remove glasses, hats, and headphones; avoid large earrings or hair covering your face | Religious head coverings are usually allowed if they don’t obscure the face |
Tools You Need to Take a Passport Photo at Home
- Smartphone or Camera – A high-resolution smartphone camera is sufficient, but a DSLR or mirrorless camera works even better. Ensure the lens is clean and the image is sharp.
- Plain Wall or Background – Use a light-colored wall, a plain sheet, or a poster board. The background must be free of patterns, furniture, or shadows.
- Tripod or Camera Stand – Stabilizes the camera to prevent blurry or tilted shots. Can be replaced with a stack of books or any stable surface if a tripod is unavailable.
- Natural Light – Indirect sunlight provides soft, even lighting. Avoid direct sunlight, harsh shadows, and overhead lights.
- Reflector or White Surface – A piece of white cardboard, foam board, or reflector helps bounce light evenly on your face to remove shadows.
- Mirror – Useful for checking posture, head position, and facial expression before taking the photo.
- Photo Editing Tools or Apps – Simple software or apps for cropping, adjusting brightness, and ensuring proper alignment without altering facial features.
- Ruler or Template – Ensures the photo is cropped to the correct size according to country-specific requirements.
- High-Quality Printer (Optional) – If you need a printed version, a printer with photo-quality paper ensures sharp and accurate results.
- Patience and Multiple Shots – Taking several photos increases the chance of getting a perfect image that meets official standards.
Step-by-Step Guide to Taking Your Own Passport Photo
Taking your own passport photo at home can feel intimidating, but with a structured approach, it becomes surprisingly simple. The first step is setting up your background. You need a plain, light-colored wall or a large white sheet that hangs smoothly without wrinkles. Avoid patterned or cluttered walls, as official guidelines require a clean backdrop. Positioning your background properly ensures your face is clearly visible and avoids shadows or distractions that could cause the photo to be rejected.
Next, focus on camera positioning. The camera should be placed at eye level, about 4 to 6 feet away, depending on the lens and space available. Using a tripod or stable surface is highly recommended to prevent shaking or uneven framing. Make sure the camera lens is centered on your face and that the image captures your shoulders and upper body. This step is critical because an off-angle or tilted shot can make it difficult to meet passport standards, even if your background and lighting are perfect.
Lighting plays a pivotal role in getting a professional-looking passport photo. Natural daylight is ideal because it creates even, soft lighting without harsh shadows. Position yourself facing a window or a bright open space, avoiding direct sunlight that can cause glare. If needed, use white reflectors or sheets to bounce light onto your face, ensuring all facial features are clearly visible. Avoid overhead lamps or flash reflections, which can cast shadows or alter the true skin tone, both of which could cause rejection by passport authorities.
Once your setup is ready, it’s time to stand correctly, take multiple shots, and review your images. Keep your shoulders straight, head upright, and eyes looking directly at the camera, maintaining a neutral expression with your mouth closed. Take several photos to increase your chances of a perfect shot, then review them carefully. Use cropping tools or online apps to adjust size and alignment without editing or altering facial features. By following these steps methodically, you can create a passport photo at home that meets official requirements and is ready for digital submission or printing.
Common Mistakes to Avoid
| Mistake | Why It Matters | How to Avoid It | Consequences | Tips for Compliance |
| Shadows on Face | Shadows can distort facial features and make identification difficult | Use natural, even lighting; avoid overhead lights | Photo may be rejected or flagged for unclear features | Face a window or use soft, indirect light; reflectors can help eliminate shadows |
| Tilted Head | Head tilt can fail official posture rules and create an unprofessional look | Keep your head straight, chin level, and eyes forward | Application may be delayed or rejected | Use a tripod and a mirror to check alignment; take multiple shots to ensure straight posture |
| Smiling or Frowning | Passport photos require a neutral expression to accurately reflect identity | Relax facial muscles and keep lips closed | Photo could be rejected for not meeting expression standards | Practice in front of a mirror to maintain a neutral, relaxed look |
| Wearing Glasses | Glasses can create glare or obscure eyes, which are critical for identification | Remove glasses or ensure eyes are fully visible without reflection | Most countries reject photos with glasses unless medically necessary | Use anti-glare settings or temporarily remove glasses while taking the photo |
| Low-Resolution Photo | Blurry or pixelated images prevent officials from seeing details clearly | Use a high-quality camera or smartphone; check image clarity before uploading | Photo may be rejected; digital uploads might fail due to size limits | Ensure photo resolution meets official guidelines (usually 300 DPI minimum) |
Editing and Formatting Your Photo
- Crop to Correct Size: Ensure the photo matches your country’s official dimensions, such as 2×2 inches (51×51 mm) for the US or 35×45 mm for many European countries. Use online cropping tools or photo software to get precise measurements without distorting your face.
- Adjust Brightness and Contrast: Make sure your face is evenly lit and the background appears pure white or light-colored. Avoid shadows, dark spots, or overexposure that can obscure facial features. Tools like brightness sliders, exposure adjustments, or contrast controls help achieve uniform lighting.
- Check Alignment and Position: Make sure your head is centered, eyes are at the correct level, shoulders are visible, and the overall composition meets passport requirements. Many online tools automatically detect face position and suggest corrections.
- Avoid Filters or Effects: Do not use Snapchat, Instagram, or any beauty filters. Passport photos must be an accurate representation of your face without digital alterations that change skin tone, eye color, or facial features.
- Save in the Correct File Format: Most passport applications accept JPEG files. Ensure the file size is under 240 KB (or as specified by your country) without compressing so much that the photo becomes blurry.
- Ensure High Resolution: Photos should be clear, sharp, and detailed. A resolution of at least 300 DPI is recommended to prevent pixelation when printed or digitally submitted.
- Check Background Uniformity: Make sure the background is plain, free of patterns, furniture, or shadows. Editing tools can help remove minor imperfections without altering your facial features.
- Final Review Before Submission: Double-check the size, lighting, alignment, and file specifications. Preview the image in the format and size it will be submitted to avoid rejections.
Using Online Passport Photo Tools
In today’s digital age, many websites provide passport photo services that make the process faster and easier, especially for those taking photos at home. These platforms allow you to upload a recent, clear photo and use their tools to adjust it to meet official requirements. By starting with a high-quality image, you minimize the risk of having your photo rejected due to blurriness, improper size, or poor lighting. Many websites also provide guidelines on how to take the photo correctly, ensuring your initial shot is suitable for editing and formatting.
Once your photo is uploaded, these tools typically allow you to crop and adjust the image to meet precise size and positioning standards. The software often uses face detection technology to automatically center your head, align your eyes, and adjust the space around your shoulders. This step ensures that your photo complies with strict passport specifications without the need for complicated manual edits. It also helps those who are unfamiliar with official requirements, as the platform provides instant guidance to make the photo acceptable.
After cropping and adjustment, the preview feature lets you double-check your photo before finalizing it. You can confirm that your face is properly centered, eyes are open, expression is neutral, and the background is plain and uniform. This step is crucial because even small mistakes, such as a slightly tilted head or uneven lighting, can lead to rejection. Many online tools highlight potential issues and suggest corrections, which saves time and reduces frustration compared to trial-and-error methods at home.
Finally, once your photo meets all the requirements, you can download or print the file in the correct format and resolution. Many services offer digital files optimized for online submission, and some even guarantee approval, giving you confidence that your photo will be accepted. This convenience is particularly valuable for passport renewals, visa applications, or any process requiring a digital photo. By using online tools, you combine the flexibility of taking your photo at home with the professional standards of a studio, ensuring a smooth, hassle-free submission process.